
Soldering jewelry can seem daunting at first, but once you master the basics, it opens up a world of creative possibilities. Whether you are a hobbyist or a budding jewelry maker, learning to solder will allow you to combine metal pieces seamlessly.
In this guide, I’ll walk you through everything you need to know to get started with soldering jewelry, from essential tools to techniques and tips for mastering the art.
You may feel overwhelmed by the idea of using heat to join metals, but with the right tools and practice, soldering can become second nature. Read on to learn how to solder jewelry step by step.
1. What is Soldering in Jewelry Making?
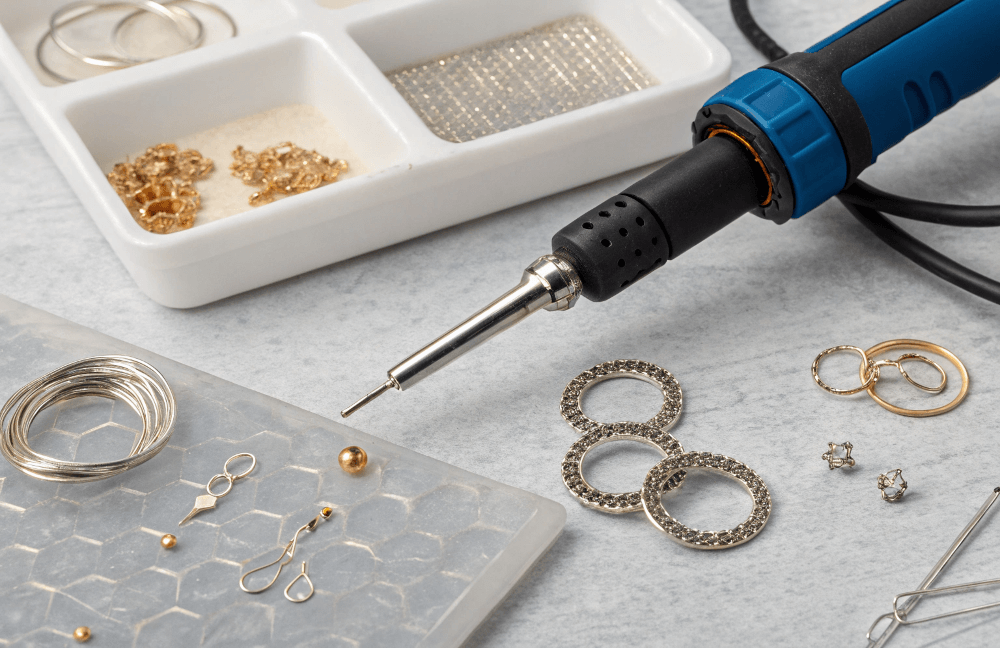
Soldering in jewelry making involves joining two or more metal pieces together using a melted filler metal (solder) that solidifies as it cools.
The process of soldering is essential for creating durable, strong jewelry pieces and allows jewelers to combine different metal parts into one cohesive design.
If you’re new to jewelry making, soldering might feel like an intimidating skill to learn. However, it’s a vital technique used in almost all jewelry production. Whether you’re looking to join a metal clasp to a bracelet or repair a broken ring, soldering is the way to go.
Types of Solder
Solder comes in different grades (hard, medium, and easy), each with a different melting point. The choice of solder depends on the metal you are working with and the project you are doing.
Why is Soldering Important?
Soldering ensures that your pieces hold together securely and can withstand wear and tear. Properly done, it creates clean, smooth joints without gaps, which is essential for both aesthetic appeal and durability.
| Type of Solder | Melting Point (°F) | Use Case |
|---|---|---|
| Hard | 1,340-1,450 | Initial soldering of pieces |
| Medium | 1,220-1,340 | General use, good for most repairs |
| Easy | 1,120-1,220 | Final joining, delicate work |
2. What Tools Do You Need for Soldering Jewelry?
Before you start soldering, it’s crucial to have the right tools.
The tools you need depend on the scale and type of your soldering projects. However, a few basic tools are essential for all beginners.
When I first started, I had a bit of confusion regarding which tools were absolutely necessary. But over time, I realized a few essentials are more than enough.
Essential Tools for Soldering Jewelry:
- Soldering Iron or Torch – The heat source needed to melt the solder.
- Tweezers – To hold small pieces of metal securely while you work.
- Third Hand or Clamp – To hold your work steady while you solder.
- Flux – Helps to clean the metal and ensure a strong bond.
- Pickle Pot – For cleaning your pieces after soldering to remove flux residues.
Optional Tools:
- Soldering board – A heat-resistant surface for your work.
- Flux brush – For applying flux with precision.
| Tool | Purpose |
|---|---|
| Soldering Iron | Heating the solder to its melting point |
| Tweezers | Holding metal pieces in place |
| Flux | Prevents oxidation and ensures a clean solder joint |
| Pickle Pot | Cleans metal after soldering |
3. How Do You Choose the Right Solder for Jewelry?
Choosing the right solder for your jewelry project is a critical decision that can impact the quality and durability of your work.
In jewelry making, solder comes in different forms depending on its melting point and the type of metal you are working with.
When you’re just starting, it’s essential to know the basics of how solder works and how to choose the right one for your project.
Solder Grades and Their Uses
- Hard solder has the highest melting point and is usually used for the initial joints when assembling jewelry.
- Medium solder works well for most standard jewelry repairs and projects.
- Easy solder has a lower melting point and is used for delicate work or final soldering steps.
Matching Solder to Metal
Solder should match the metal type you are working with. For example, if you’re working with gold, ensure your solder is compatible with the gold alloy. This ensures a seamless bond and avoids tarnishing or weakening the piece.
| Metal Type | Solder Type Recommended |
|---|---|
| Silver | Hard, Medium, Easy |
| Gold | Hard, Medium |
| Copper | Hard, Medium |
4. What Are the Basic Soldering Techniques for Jewelry?
To get started with soldering jewelry, you need to master some basic techniques.
The process of soldering can be broken down into clear, manageable steps.
Step-by-Step Process for Soldering Jewelry:
- Prepare Your Workspace – Make sure everything is clean and within reach.
- Clean Your Metal – Dirt and oxidation can interfere with the soldering process.
- Apply Flux – Flux is essential to ensure the metal bonds properly.
- Heat the Joint – Use your torch or soldering iron to heat the joint evenly.
- Apply Solder – Introduce the solder to the joint once the metal reaches the proper temperature.
Tips for Successful Soldering:
- Make sure you do not overheat the metal; this can cause it to warp or discolor.
- Keep the pieces steady to avoid misalignment.
| Soldering Step | Action |
|---|---|
| Clean the Metal | Remove dirt and oxidation |
| Apply Flux | Ensure smooth flow of solder |
| Heat the Joint | Use torch or soldering iron evenly |
| Apply Solder | Introduce solder to heated joint |
5. How Do You Prepare Jewelry for Soldering?
Proper preparation is key to successful soldering. Without proper preparation, even the best soldering technique might result in a weak joint or a failed project.
Getting everything ready before you begin soldering ensures that the process goes smoothly and that the final result is strong and clean.
Step-by-Step Guide to Preparing Jewelry for Soldering
- Clean Your Metal Pieces: Dirt, oils, and oxidation can prevent solder from bonding. Use a brass brush, sandpaper, or a rotary tool to clean the metal surfaces before soldering.
- Align the Pieces: Position the pieces you want to join in their final place. You can use tweezers, clamps, or even a third hand to hold the pieces steady.
- Apply Flux: Apply flux to the area where the solder will be applied. Flux prevents oxidation and allows the solder to flow properly.
Tools to Use for Preparation
- Pickle pot: To clean metal pieces after soldering.
- Third hand: To hold delicate pieces in place while you work.
- Soldering board: A heat-resistant surface to work on.
| Preparation Step | Purpose |
|---|---|
| Clean the Metal | Removes dirt and oxidation to ensure solder bonding |
| Align the Pieces | Ensures accurate placement of metal parts |
| Apply Flux | Helps solder flow and prevents oxidation |
6. What Are Common Soldering Mistakes and How to Avoid Them?
Even experienced jewelers make mistakes when soldering. However, knowing what common issues to look out for and how to fix them can help you avoid costly errors.
Recognizing and understanding these mistakes will make you a better jewelry maker in the long run.
Common Soldering Mistakes:
- Overheating the Metal: If the metal gets too hot, it can warp or discolor. Be mindful of the heat you apply.
- Using Too Much Flux: Excess flux can cause solder to flow uncontrollably and create a mess.
- Misaligning Pieces: Misaligned pieces won’t solder properly and may result in gaps or weak joints.
How to Avoid These Mistakes:
- Use a temperature-controlled soldering iron or torch.
- Only apply the right amount of flux to the joint area.
- Double-check alignment before applying heat.
| Mistake | Cause | How to Avoid |
|---|---|---|
| Overheating the Metal | Applying excessive heat to the metal | Control the temperature carefully |
| Using Too Much Flux | Applying flux beyond the necessary amount | Use flux sparingly |
| Misaligning Pieces | Not aligning pieces properly before heating | Double-check alignment before soldering |
7. How Do You Solder Two Pieces of Jewelry Together?
Soldering two pieces of jewelry together requires precision and attention to detail.
The goal is to create a seamless, strong bond between the two pieces.
Step-by-Step Process for Soldering Two Pieces
- Place the Pieces: Ensure that both pieces fit together tightly. You may need to use clamps or a third hand to hold them in place.
- Heat the Joint Evenly: Apply heat to the joint, not directly on the solder. This allows the metal to reach the appropriate temperature.
- Apply Solder: Introduce the solder to the heated joint. It should flow smoothly between the two pieces.
Tips for a Strong Bond:
- Use flux to promote better solder flow.
- Avoid touching the joint after applying solder to avoid disturbing the flow.
| Step | Action | Tool Used |
|---|---|---|
| Place the Pieces | Position the metal pieces tightly together | Third hand, clamps |
| Heat the Joint | Heat the joint area evenly to prepare for solder | Soldering torch or iron |
| Apply Solder | Apply solder to the heated joint | Solder wire or sheet |
8. What Are the Best Soldering Techniques for Delicate Jewelry?
Delicate jewelry, such as pieces with thin wires or embedded stones, requires special care when soldering.
You’ll need to use a gentler touch and perhaps different soldering techniques than for standard projects.
Techniques for Soldering Delicate Jewelry
- Use Easy Solder: For delicate pieces, easy solder with a lower melting point is ideal. It minimizes the risk of damage.
- Use a Smaller Torch or Soldering Iron: A small flame helps you maintain control over the heat, preventing it from spreading to sensitive areas.
- Heat Gradually: Gradually heat the metal, starting from the area farthest from the delicate parts.
Tips for Soldering Stones:
- Be sure to use a heat sink or shield to protect stones from heat damage.
- Use a lower temperature flame to avoid affecting stone colors or integrity.
| Technique | Recommended Method | Tool Used |
|---|---|---|
| Use Easy Solder | Apply solder with a lower melting point | Easy solder, flux |
| Use Small Torch | Avoid large flames for delicate parts | Small torch or soldering iron |
| Heat Gradually | Heat metal slowly to prevent sudden temperature changes | Slow heating process |
9. How Do You Fix Soldering Mistakes in Jewelry?
Even the best jewelers make mistakes from time to time. The key is knowing how to fix them without compromising the piece.
Being able to correct errors will save you time and frustration in the long run.
Fixing Soldering Mistakes:
- Reheat the Joint: If the solder hasn’t flowed properly, you can reheat it and add more solder.
- File and Polish: If the solder has flowed too much, use a file to smooth the area.
- Reposition the Pieces: If pieces aren’t aligned properly, carefully reposition them before reheating.
Using Pickle to Clean After Fixing:
Pickle is a solution used to clean metal after soldering. It helps remove oxidation and flux residue. Always ensure your pieces are clean before the final polishing stage.
| Fixing Mistake | Method | Tool Used |
|---|---|---|
| Reheat the Joint | Reheat the area and add more solder | Soldering iron or torch |
| File and Polish | Smooth over excess solder with a file | File, polishing tools |
| Reposition the Pieces | Adjust misaligned pieces before reheating | Tweezers, third hand |
10. What Is the Role of Flux in Soldering Jewelry?
Flux is an essential component in the soldering process that helps to ensure a clean and strong bond between metal pieces.
It prevents oxidation and ensures that the solder flows smoothly during the heating process.
Types of Flux:
- Liquid Flux: Applied with a brush or syringe, it’s used for general soldering purposes.
- Paste Flux: This type of flux is thicker and is typically used in larger projects or where precise application is needed.
How to Apply Flux:
- Apply a thin layer of flux to the joint area before heating the metal.
- Use only a small amount to avoid excess that may cause issues during soldering.
| Flux Type | Characteristics | Use Case |
|---|---|---|
| Liquid Flux | Thinner consistency, easy to apply with brush | General soldering applications |
| Paste Flux | Thicker consistency, applied more precisely | Ideal for detailed work |
11. How Can You Ensure a Clean Soldering Job?
A clean soldering job not only enhances the durability of the piece but also ensures that it looks professionally done.
To achieve a clean, polished finish, proper cleaning and finishing steps are required after soldering.
Steps to Achieve a Clean Soldering Job:
- Remove Excess Solder: After the soldering process, use a file or sandpaper to remove any excess solder that has spilled over the joint.
- Clean the Metal: After soldering, clean the metal pieces with a pickle solution to remove any flux residue or oxidation.
- Polish: Use a polishing tool or cloth to give the jewelry piece a smooth, shiny finish.
Tools for Cleaning:
- Pickle solution: Removes flux and oxidation from metal.
- Polishing cloth: Ensures a smooth, shiny finish after cleaning.
| Step | Action | Tool Used |
|---|---|---|
| Remove Excess Solder | File off any unwanted solder | File, sandpaper |
| Clean the Metal | Use a pickle solution to clean metal parts | Pickle solution |
| Polish | Polish the jewelry piece for a shiny finish | Polishing cloth, wheel |
12. How Does Temperature Affect the Soldering Process?
Temperature plays a crucial role in soldering. The right temperature ensures a smooth flow of solder and proper bonding.
Understanding how temperature affects your project is key to preventing damage to your workpieces.
Effects of Temperature on Soldering:
- Too High Temperature: This can cause the metal to warp or discolor, and it may melt or damage stones and delicate components.
- Too Low Temperature: If the temperature is too low, the solder won’t melt or bond the pieces properly.
Tips for Managing Temperature:
- Always use a heat-controlled torch or iron.
- Monitor the metal’s color as it heats to ensure it reaches the correct temperature.
| Temperature Level | Effect | Solution |
|---|---|---|
| Too High | Causes warping and discoloration of metal | Control temperature carefully |
| Too Low | Prevents solder from bonding properly | Use a controlled heat source |
13. What Safety Precautions Should You Take While Soldering Jewelry?
Soldering involves working with high heat, so safety precautions are vital to prevent accidents.
Protecting yourself and your workspace is critical when working with potentially hazardous materials.
Safety Precautions for Soldering:
- Wear Protective Gear: Always wear goggles, gloves, and a heat-resistant apron.
- Work in a Well-Ventilated Area: Soldering produces fumes that can be harmful if inhaled.
- Use a Fireproof Surface: Ensure your work surface is heat-resistant to prevent any fire hazards.
Tools for Safety:
- Safety glasses: To protect your eyes from heat and flux fumes.
- Fireproof work surface: To ensure you’re working in a safe area.
| Safety Measure | Purpose | Tool Used |
|---|---|---|
| Wear Protective Gear | Protects from heat and fumes | Safety glasses, gloves, apron |
| Work in Ventilated Area | Prevents inhalation of harmful fumes | Ventilation system |
| Use Fireproof Surface | Prevents fire hazards from high heat | Fireproof work surface |
14. How Do You Practice Soldering Skills as a Beginner?
Soldering takes time and practice to master. The more you practice, the better your skills will become.
Start with simple projects and gradually move on to more complex pieces as you gain confidence.
Beginner-Friendly Soldering Projects:
- Simple Ring Soldering: Start by soldering small, simple rings together. This helps you practice controlling the temperature and applying flux correctly.
- Making Solder Joints: Practice making clean solder joints on simple pieces of scrap metal to refine your technique.
Tips for Beginners:
- Start with small, inexpensive metals to minimize mistakes.
- Practice using different solders and adjust the flame intensity as needed.
| Beginner Project | Description | Skill Developed |
|---|---|---|
| Simple Ring Soldering | Join simple metal rings together | Joint alignment, temperature control |
| Making Solder Joints | Practice soldering scrap pieces of metal | Solder flow, precision work |
15. When Should You Seek Professional Help for Soldering Jewelry?
While many soldering projects can be done at home, there are times when it’s best to consult a professional.
Understanding when to seek professional help will save you time, money, and effort.
When to Seek Professional Help:
- Complex Projects: If you’re working with expensive or intricate pieces, it’s a good idea to consult a professional to avoid costly mistakes.
- Repair Work: If the item you’re working on is too delicate or valuable, professional jewelers have the experience to repair it properly.
Benefits of Professional Help:
- Precision work, especially for delicate components.
- Avoiding costly mistakes and damage to valuable pieces.
| Reason for Professional Help | Situation | Benefit |
|---|---|---|
| Complex Projects | Working on detailed or expensive jewelry | Ensures quality and durability |
| Repair Work | Fixing valuable or delicate jewelry items | Avoids mistakes and further damage |
Conclusion
Soldering is a fundamental skill in jewelry making. Once you’ve mastered the basics, you’ll be able to create beautiful, durable pieces of jewelry. It’s a skill that requires patience, practice, and the right tools.
As you continue to practice and refine your technique, you’ll become more comfortable with advanced soldering techniques and gain more confidence in your jewelry-making skills.
FAQ
- Q1: What is soldering in jewelry making?
Soldering in jewelry making is a process where two or more metal pieces are joined together using a filler metal that melts and cools to create a strong bond. - Q2: How does a soldering iron differ from a torch in jewelry making?
A soldering iron is used for precision work with lower temperatures, while a torch is more versatile and provides higher heat, which is ideal for melting larger amounts of solder. - Q3: What types of solder are best for beginners?
For beginners, easy solder is recommended as it has a lower melting point, making it easier to work with and less likely to overheat the metal. - Q4: Can you solder over stones or other delicate components?
Yes, but you should exercise caution and use lower melting point solder to avoid damaging the stones or delicate components. - Q5: How do I fix a soldering mistake?
To fix a soldering mistake, you can reheat the joint, adjust the alignment, or remove excess solder using a file or tool designed for the purpose.


