When it comes to soldering stainless steel, it’s not always easy. It requires the right materials, equipment, and techniques. Many people struggle with getting a strong, clean bond, but I’ll show you how to make it easier.
In this guide, I’ll walk you through the entire process of soldering stainless steel. From preparing the material to cooling the joint, you’ll learn the steps necessary for a successful solder.
The process isn’t complicated once you break it down into manageable steps. Let’s dive in and make sure your next stainless steel soldering project goes smoothly!
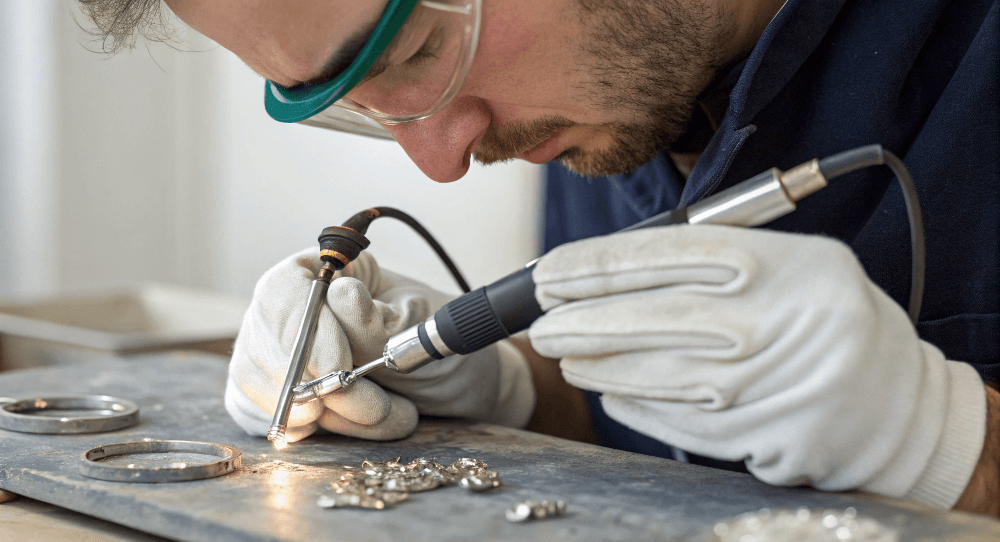
1. What Are the Basics of Soldering Stainless Steel?
Soldering stainless steel can be tricky, especially for beginners. If you’re wondering why it’s so difficult, it’s because stainless steel requires more heat than other metals. You also need to choose the right solder, flux, and equipment. Without the right setup, the joint won’t hold up well.
So, what exactly is soldering?
Soldering is a process where you use a filler metal, known as solder, to join two pieces of metal together. This filler metal melts at a lower temperature than the metal you’re joining, which makes it possible to bond metals without melting them.
When it comes to stainless steel, soldering can be a little more challenging. Stainless steel has a high melting point, so you need equipment that can handle high heat. In addition to choosing the right tools, preparing the surface is just as important. Any dirt or oils on the surface can prevent the solder from bonding properly.
Here’s a quick look at the tools and materials you’ll need to solder stainless steel:
| Tools & Materials | Description |
|---|---|
| Soldering Iron | A basic tool for smaller projects |
| Blowtorch | For higher heat applications |
| Flux | Prevents oxidation and helps solder flow |
| Solder (Silver, Lead-Free) | Specific types for stainless steel |
By understanding the basics of soldering and having the right tools, you can begin your project with confidence.
2. How to Prepare Stainless Steel for Soldering?
Before you even think about applying heat, you need to make sure the surface of your stainless steel is prepared properly. If the surface isn’t clean, the solder will struggle to bond effectively.
Why is surface preparation so important?
You can’t just start soldering without ensuring that the metal is free from oils, rust, and other contaminants. These impurities can prevent the solder from bonding, which can weaken your joint and lead to potential failures down the line.
To prepare the stainless steel for soldering, you’ll need to:
- Clean the surface: Use a wire brush or sandpaper to remove dirt, rust, or oxidation. This helps create a clean, smooth surface for solder to adhere to.
- Remove oils: Use a solvent like acetone to clean the surface. Oils from your hands or the environment can easily be transferred to the metal, which interferes with soldering.
- Apply flux: Flux is crucial in the soldering process. It helps clean the metal further, allows the solder to flow smoothly, and prevents oxidation.
Once your stainless steel is clean and prepared, you’re ready for the next steps.
| Surface Preparation Steps | Tools Needed |
|---|---|
| Clean the surface | Wire brush, sandpaper |
| Remove oils | Acetone, solvent |
| Apply flux | Flux paste or liquid |
3. What Type of Solder Should You Use for Stainless Steel?
Not all solders are created equal. When working with stainless steel, it’s essential to choose the right type of solder. The wrong solder will either fail to bond or won’t withstand high temperatures. So, what should you look for?
What makes solder suitable for stainless steel?
The best solder for stainless steel will have a high melting point and a strong bonding capability. For stainless steel, you’ll generally want to choose a silver solder or a lead-free option that has a similar high melting point.
Here’s a closer look at the options:
| Type of Solder | Pros | Cons |
|---|---|---|
| Silver Solder | Strong bond, high heat resistance | More expensive |
| Lead-Free Solder | Safe for food-related projects | Slightly lower melting point |
Choosing the right solder is crucial for achieving a strong, durable bond. Silver solder is a popular choice, but lead-free options are also widely used, especially in applications that require food safety.
Once you’ve chosen your solder, it’s time to get the equipment ready!
4. How Do You Set Up Your Soldering Equipment?
Setting up your soldering equipment is a crucial step in ensuring your project goes smoothly. You need to ensure that you have everything in place before you begin applying heat.
How do you prepare the soldering equipment?
For smaller projects, a basic soldering iron may be sufficient. However, for stainless steel, you may need a blowtorch to get the necessary heat to melt the solder. Here’s what you’ll need to do:
- Prepare the soldering iron: Ensure that the soldering iron is clean and in good working condition. Check that the tip is not worn down or damaged, as this will affect the heat transfer.
- Set up the blowtorch: If you’re using a blowtorch, ensure that you have the correct fuel and that it’s properly adjusted. A good flame is essential for achieving the right temperature.
Once your equipment is ready, make sure to double-check your workspace for safety. You’ll be working with high temperatures, so it’s essential to have proper ventilation and safety gear.
| Equipment Preparation | Action |
|---|---|
| Soldering Iron | Check tip, clean and heat it |
| Blowtorch | Adjust flame, check fuel levels |
5. How Do You Apply Flux Before Soldering Stainless Steel?
Applying flux is a critical step in the soldering process. Flux helps clean the metal surface, prevents oxidation, and ensures the solder flows smoothly into the joint. Without proper flux application, the solder may fail to bond properly.
Why is flux necessary for soldering stainless steel?
Flux plays a vital role by cleaning the surface of the stainless steel. It removes any impurities and oxidation that can hinder the bonding process. It also creates an environment where the solder can flow more easily, making the joint stronger and more durable.
Steps for Applying Flux:
- Choose the right flux: Use a flux that’s compatible with stainless steel. There are many types of fluxes available, such as paste or liquid flux. Each type has its benefits.
- Apply evenly: Use a brush or applicator to apply a thin, even layer of flux to the surfaces you are about to join. Avoid over-applying, as too much flux can cause unwanted residue.
- Work quickly: Flux can evaporate or lose its effectiveness if exposed to air for too long. Apply it right before you begin heating the joint.
| Flux Type | Application Method | Pros | Cons |
|---|---|---|---|
| Paste Flux | Apply with a brush | Easy to control, no spills | Can be difficult to remove |
| Liquid Flux | Use a dropper or brush | Can reach tight spots easily | May evaporate quickly |
| Rosin Flux | Apply as a paste | Great for electrical joints | Not ideal for high-heat applications |
6. How Do You Position the Soldering Iron on Stainless Steel?
Positioning your soldering iron or blowtorch correctly is vital to ensure heat is applied evenly and efficiently. Too much heat in one area can damage the metal, while insufficient heat can prevent the solder from bonding properly.
What is the best way to position the soldering iron for optimal results?
The position of the soldering iron’s tip is essential for a clean and strong bond. Focus on heating the base metal, not the solder itself. The solder should melt when it comes into contact with the heated base metal.
Tips for Proper Positioning:
- Hold the soldering iron at an angle: Position the soldering iron at a slight angle to ensure even heat distribution.
- Focus on the joint: Direct the heat toward the joint where the two metals meet.
- Move the tip constantly: Avoid keeping the soldering iron in one place for too long, as it could overheat and damage the steel.
| Tip Positioning | Result | Best For |
|---|---|---|
| Slight angle to the joint | Even heat distribution | Small and medium projects |
| Direct contact with joint | Maximum heat focus | Larger projects with thicker joints |
| Quick, constant movement | Prevents overheating | Thin metal joints |
7. How Do You Add Solder to Stainless Steel?
Once the surfaces are prepared, flux is applied, and the soldering iron is properly positioned, it’s time to add the solder. Adding the right amount of solder is crucial to achieving a solid bond.
What’s the correct way to add solder to stainless steel?
You don’t want to flood the joint with solder, but you also don’t want it to be too thin. The goal is to achieve a smooth, even bead of solder along the joint, making sure the solder completely fills the gap between the two metal pieces.
Step-by-Step Process:
- Heat the joint: Ensure the base metal reaches the right temperature.
- Feed the solder: Gently feed the solder wire to the joint while continuously applying heat.
- Let the solder flow: As the solder melts, it will flow into the joint. Make sure it completely fills the area.
| Solder Type | Temperature Required | Ideal Use |
|---|---|---|
| Silver Solder | 650-750°F (343-399°C) | Best for high-strength joints |
| Lead-Free Solder | 400-500°F (204-260°C) | Ideal for environmental projects |
8. How Do You Ensure a Strong Bond During Soldering?
Achieving a strong bond during soldering is crucial for the longevity and functionality of your project. A weak bond can result in joint failure, leading to costly repairs or replacements.
What factors contribute to a strong soldering bond?
Several factors contribute to a strong soldering bond, including proper heat application, correct soldering materials, and ensuring the surfaces are clean. You must also make sure that the solder flows well into the joint and that it has a consistent bead around the entire seam.
Tips for Strengthening the Bond:
- Ensure complete surface contact: Make sure the solder flows into all parts of the joint.
- Allow proper cooling: Let the joint cool naturally. Rapid cooling can weaken the bond.
- Use the right soldering materials: High-quality solder and flux help ensure a durable bond.
| Soldering Technique | Result | Best Practice |
|---|---|---|
| Even heat distribution | Strong, even bond | Maintain constant movement |
| Complete joint coverage | Maximum bond strength | Apply solder until fully filled |
| Slow cooling | Improved bond durability | Let the joint cool naturally |
9. How to Cool and Clean Soldered Stainless Steel?
After completing the soldering process, it’s important to cool the joint properly and remove excess solder or flux to ensure a clean, professional finish.
Why is proper cooling and cleaning important?
Improper cooling can cause the metal to warp, which might weaken the joint. Similarly, leftover flux can degrade the strength of the bond. By cleaning and cooling the joint properly, you ensure that it maintains its integrity and that your finished piece looks polished.
Cooling and Cleaning Process:
- Let the joint cool naturally: Do not quench it in water as this can cause the joint to crack.
- Clean the joint: Use a soft brush or abrasive cloth to clean the joint. If necessary, apply a solvent to remove flux residue.
| Cleaning Tools | Purpose | Recommended For |
|---|---|---|
| Soft Brush | Remove flux and debris | Post-soldering clean up |
| Abrasive Cloth | Polish and smooth the joint | Final finish for aesthetic appeal |
| Solvent (Acetone) | Remove sticky residue | For difficult flux removal |
10. How Do You Finish Soldered Stainless Steel Projects?
The final step in soldering stainless steel is finishing the project. This is where the look and feel of your work really take shape.
How do you ensure a clean, professional finish?
After soldering and cleaning, the next step is to polish the joint and the surrounding areas. This helps remove any imperfections and gives the metal a smooth, shiny appearance. You’ll also want to check the functionality of the soldered joint to ensure that it is stable and strong.
Finishing Steps:
- Polish the joint: Use a polishing cloth or machine to smooth the soldered area.
- Inspect for weak spots: Check the joint for any signs of weakness or cracks.
- Apply a protective coating: For added durability, apply a protective coating to prevent rust or tarnishing.
| Finishing Step | Tools Needed | Outcome |
|---|---|---|
| Polishing | Polishing cloth or machine | Smooth, shiny finish |
| Inspection | Magnifying glass, light | Ensure no weak spots remain |
| Protective Coating | Clear coat or oil | Prevent rust and tarnish |
By following these finishing steps, you ensure that your soldering job is not only functional but also visually appealing.
11. How Do You Identify and Fix Common Mistakes When Soldering Stainless Steel?
Even experienced solderers encounter mistakes from time to time. Whether it’s improper bonding or uneven solder flow, identifying and fixing these issues quickly can save your project.
What are some common mistakes in soldering stainless steel?
Some of the most frequent mistakes when soldering stainless steel include applying too much heat, improper joint alignment, or using the wrong type of solder. By recognizing these errors, you can troubleshoot and adjust your technique to avoid them in future projects.
Common Soldering Mistakes and Fixes:
- Overheating the joint: This can cause discoloration or warping of the steel. If you’ve overheated the joint, allow it to cool and then reapply solder with a more controlled heat.
- Cold solder joints: If the solder didn’t bond properly, reheat the joint and add more solder to ensure a stronger bond.
- Excess solder: If you’ve applied too much solder, clean up the excess with a wire brush and reflow the solder for a smoother finish.
| Mistake | Cause | Solution |
|---|---|---|
| Overheating | Applying too much heat | Reheat and adjust temperature |
| Cold solder joints | Insufficient heat application | Reflow solder and add more |
| Excess solder | Overapplying solder | Clean excess, reflow for smooth finish |
12. How Can You Practice Soldering Stainless Steel?
As with any skill, practice makes perfect. The more you practice, the more confident you’ll become in your soldering technique. Whether you’re a beginner or intermediate solderer, practicing on small projects is a great way to build your skills.
What are some good practice projects for soldering stainless steel?
Starting with small, manageable projects allows you to refine your technique without wasting material. Over time, you can progress to more complex projects as you build your experience.
Practice Project Ideas:
- Small joints: Try soldering small pieces of stainless steel together to practice controlling the heat and solder flow.
- Pipes or tubes: Soldering small pipes can help you learn how to deal with joints that are more challenging.
- Jewelry or art projects: Once you’ve gained confidence, try creating small stainless steel jewelry pieces or art for practice.
| Practice Project | Difficulty Level | Skill Developed |
|---|---|---|
| Small joints | Beginner | Control heat and solder flow |
| Soldering pipes | Intermediate | Handling larger joints |
| Jewelry/art projects | Advanced | Fine control, attention to detail |
13. What Are the Benefits of Mastering Soldering Stainless Steel?
Mastering the technique of soldering stainless steel has numerous benefits, both in terms of the quality of your work and the range of projects you can tackle. As you refine your skills, you’ll find that soldering opens up opportunities for more complex and rewarding projects.
Why is it worth learning to solder stainless steel?
Once you’re comfortable with the basics of soldering stainless steel, you can use the technique in a wide range of applications, from repairing machinery to creating custom pieces of jewelry. Mastering this skill allows you to work on higher-value projects and ensures that your work is of the highest quality.
Benefits of Mastering Stainless Steel Soldering:
- Greater flexibility: You can work on a wider range of projects, including automotive repairs, household repairs, and artwork.
- Improved quality: By mastering soldering, you improve the quality of your work and ensure that joints are stronger and more durable.
- Cost savings: With the ability to solder stainless steel yourself, you can save money on professional services or replacements.
| Benefit | Impact on Your Work | Example Project |
|---|---|---|
| Greater flexibility | Ability to take on more projects | Automotive repair, DIY projects |
| Improved quality | Higher-strength joints | Custom-made stainless steel furniture |
| Cost savings | Avoid costly replacements | Fixing broken machinery parts |
14. What Safety Tips Should You Follow When Soldering Stainless Steel?
Soldering involves working with high heat, potentially hazardous materials, and sharp tools. It’s essential to follow safety guidelines to protect yourself from burns, fumes, and accidents.
What are the safety precautions to follow when soldering?
Soldering can be dangerous if proper safety measures aren’t followed. Wearing protective gear, ensuring good ventilation, and using heat-resistant tools are just a few ways to protect yourself.
Key Safety Tips for Soldering:
- Wear protective gear: Always wear heat-resistant gloves and eye protection to protect yourself from burns and flying solder.
- Work in a well-ventilated area: Soldering can produce harmful fumes. Make sure you work in a well-ventilated space or use a fume extractor.
- Use heat-resistant mats: Keep a heat-resistant mat under your work area to avoid burns or damage to surfaces.
- Keep tools in good condition: Regularly check your soldering tools to make sure they’re safe to use.
| Safety Tip | Why It’s Important | How to Implement |
|---|---|---|
| Wear protective gear | Protects from burns and fumes | Use gloves, goggles, and long sleeves |
| Work in a ventilated area | Avoid inhaling toxic fumes | Open windows, use a fume extractor |
| Use heat-resistant mats | Prevents damage to surfaces | Place mats under your work area |
| Check tools regularly | Ensures safe equipment use | Inspect tools before use |
15. How Do You Finish Your Stainless Steel Soldering Project?
Finishing your soldering project properly is just as important as the actual soldering. The final touches can make a big difference in the overall quality and appearance of your work.
What are the steps to properly finish your soldering project?
Once the soldering is complete, you’ll need to clean the joint, remove excess flux, and polish the metal. These final steps ensure that your project is both functional and aesthetically pleasing.
Finishing Steps for Stainless Steel Soldering:
- Clean the joint: Use a wire brush or solvent to remove any excess flux or solder that may have been left behind.
- Polish the metal: Use a polishing cloth or polishing machine to give the metal a smooth, shiny finish.
- Check for stability: Gently test the joint for strength and ensure it’s properly bonded before putting the project to use.
| Finishing Step | Tools Needed | Purpose |
|---|---|---|
| Clean the joint | Wire brush, solvent | Remove flux and debris |
| Polish the metal | Polishing cloth, machine | Create a smooth, shiny finish |
| Check stability | Magnifying glass, tester | Ensure joint strength |
By following these finishing steps, your soldering projects will not only be functional but also look professionally done, adding both strength and beauty to your work.
Conclusion
Soldering stainless steel can seem complicated, but with the right tools and techniques, it’s definitely manageable. By preparing the surface properly, choosing the right solder, and setting up your equipment correctly, you’ll be able to achieve strong, reliable joints. Keep practicing, and soon you’ll be soldering like a pro.
FAQ Section
Q1: What is soldering?
Soldering is the process of joining two metals using a filler material (solder) that melts at a lower temperature than the metals being joined.
Q2: How does flux help with soldering stainless steel?
Flux cleans the metal surface and prevents oxidation, helping the solder flow smoothly and bond better.
Q3: Can I solder stainless steel with a regular soldering iron?
For small projects, a soldering iron may suffice. For larger projects, a blowtorch is recommended due to the higher heat required for stainless steel.
Q4: How do I clean stainless steel before soldering?
Use a wire brush or sandpaper to remove rust, followed by acetone to remove oils and other contaminants.
Q5: What should I do if my soldered joint is weak?
If the joint is weak, ensure you’re applying enough heat, using the correct solder, and that the surfaces are clean and well-prepared.